Tag

DIY

Browsing

Wood furniture is a timeless and elegant addition to any home, but even the most well-crafted pieces can fall victim to damage over time. From scratches and dents to water stains and fading, the wear and tear of everyday life can take a toll on your beloved furnishings. In this article, we will explore effective strategies for preventing and treating wood furniture damage, helping you preserve the beauty and longevity of your prized possessions. Whether you’re a seasoned wood furniture enthusiast or a novice homeowner looking to protect your investment, these tips and tricks are sure to come in handy.

Estimated mill topic prime wood furniture Overview Anthology Nuclear

Recognizing Common Causes of Wood Furniture Damage

Wood furniture can add warmth and character to any space, but it is important to be aware of the common causes of damage so that you can prevent and treat them effectively. By recognizing these causes, you can prolong the life of your beloved furniture pieces and keep them looking their best for years to come.

One common cause of wood furniture damage is exposure to sunlight. Over time, UV rays can fade the finish and cause the wood to become dry and brittle. To prevent this, consider placing your furniture away from direct sunlight or using curtains or blinds to block out the rays. Additionally, applying a protective finish or using a UV-resistant polish can help to maintain the wood’s natural beauty.

Another culprit of wood furniture damage is moisture. Excess humidity can cause the wood to warp, while water spills can leave unsightly stains. To protect your furniture, be sure to keep it away from sources of moisture, such as windows or bathrooms. In the event of a spill, be sure to wipe it up immediately and use a wood-safe cleaner to prevent lasting damage.

Scratches and dents are also common issues that can detract from the beauty of your wood furniture. To prevent these, consider using felt pads on the bottoms of chair legs to protect floors, and place coasters under glasses to prevent water rings. If damage does occur, you can repair minor scratches with a touch-up marker or fill in dents with a wood filler. With a little care and attention, you can keep your wood furniture looking its best for years to come.

Key Prevention Strategies for Protecting Wood Furniture

Wood furniture can add warmth and charm to any home, but it is important to take preventative measures to protect it from damage. By implementing key strategies, you can extend the life of your wood furniture and keep it looking its best for years to come.

One effective way to prevent damage to wood furniture is to place felt pads under heavy items or objects that may scratch the surface. This simple but effective measure can help preserve the finish and integrity of the wood. Additionally, using coasters or placemats under glasses and hot dishes can prevent water rings and heat damage.

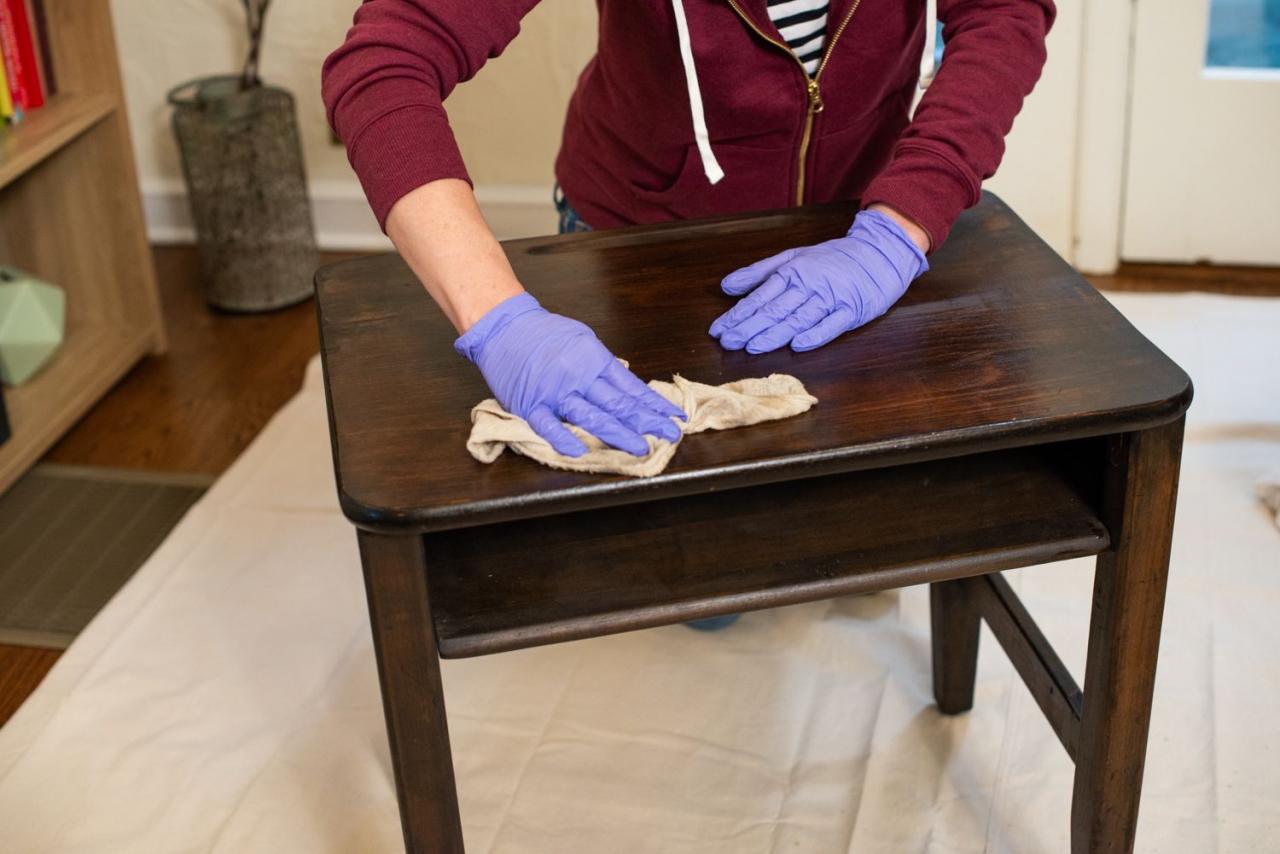
Regular dusting and cleaning of wood furniture is also essential in maintaining its beauty. Use a soft, lint-free cloth to gently dust the surface, and avoid using harsh chemical cleaners that can strip the finish. For stubborn stains, a mixture of mild soap and water can be used, followed by a thorough drying with a clean cloth.

Lastly, it is important to keep wood furniture away from direct sunlight and sources of heat, as prolonged exposure can cause the wood to warp and fade. By following these preventative strategies, you can ensure that your wood furniture remains in excellent condition and continues to enhance your living space.

Essential Tips for Repairing and Restoring Damaged Wood Furniture

Wood furniture is a beautiful and timeless addition to any home, but over time it can become damaged and worn. Whether it’s scratches, watermarks, or cracks, there are ways to repair and restore your beloved pieces back to their former glory. Here are some essential tips to help you prevent and treat wood furniture damage:

  • Regular Maintenance: Dusting and polishing your wood furniture regularly can help prevent scratches and wear from accumulating over time.
  • Protective Measures: Use coasters, placemats, and tablecloths to protect your furniture from watermarks, heat damage, and scratches caused by daily use.
  • Repairing Scratches: For minor scratches, try using wood markers or touch-up pens to fill in the damaged area. For deeper scratches, consider using wood filler and sanding to smooth out the surface.
  • Restoring Finish: If the finish on your wood furniture has worn away, consider refinishing the piece with a fresh coat of stain or varnish to bring back its original luster.
Damage Type Treatment
Watermarks Try using a mixture of equal parts vinegar and olive oil to remove watermarks from wood furniture.
Cracks Fill in cracks with wood glue and clamp the pieces together until the glue dries completely.

By following these tips and taking care of your wood furniture, you can ensure that your pieces remain beautiful and functional for years to come. Remember to always consult a professional if you’re unsure about how to properly repair or restore damaged wood furniture.

In conclusion, taking care of your wood furniture is essential to ensure its longevity and beauty. By following the preventative tips mentioned in this article, you can protect your furniture from damage and maintain its overall condition. But in the unfortunate event that your furniture does suffer from damage, don’t worry – there are always ways to treat and restore it back to its former glory. Remember, a little love and care can go a long way in preserving the beauty of your wood furniture for years to come. So, next time you see a scratch or a water stain, don’t fret – with the right knowledge and techniques, you can keep your furniture looking as good as new. Thank you for reading!

Are you tired of staring at that wobbly chair or scratched up coffee table in your living room? Have no fear, because DIY furniture repair is here to save the day! In this article, we will explore some clever tips and tricks to help you breathe new life into your old furniture pieces. Whether you’re a seasoned DIY enthusiast or a total amateur, these simple yet effective techniques will have you feeling like a pro in no time. So, grab your tools and let’s get to work!

Thomas Furniture Restoration, 47% OFF | www.flavors.qa

When it comes to DIY furniture repair, headings are crucial for organizing your project and keeping track of each step. Here are some tips and tricks to help you make the most of your

  • Use descriptive Make sure your headings clearly indicate what each section is about. This will help you stay organized and easily navigate through your repair process.
  • Group related tasks together: Organize your headings in a logical order that makes sense for the repairs you need to make. This will help you tackle one task at a time without feeling overwhelmed.
  • Consider using sub If your repair project is complex, consider using subheadings under main headings to further break down the tasks. This will help you stay focused and not miss any important steps.
Heading Type Importance
Main Headings Essential for organizing the overall project
Subheadings Useful for breaking down complex tasks

Fixing Loose Joints: A Guide to Strengthening Wobbly Furniture

If you have wobbly furniture in your home, don’t fret! There are simple DIY techniques you can use to strengthen those loose joints and make your furniture more stable. Here are some tips and tricks to help you fix your wobbly furniture:

  • Tighten screws and bolts: Check for loose screws or bolts in the joints of your furniture. Use a screwdriver or wrench to tighten them up, which can help stabilize the piece.
  • Apply wood glue: If the joints are still loose after tightening the screws, apply wood glue to the area. This will help bond the pieces together and provide extra strength.
  • Insert wooden dowels: For extra reinforcement, you can insert wooden dowels into the joints. Drill holes into the pieces, apply wood glue, and insert the dowels to add more stability.

Restoring Scratched Surfaces: Techniques for Repairing Wood Furniture

One common issue many homeowners face is dealing with scratches on their wood furniture. Whether it be from pets, kids, or just general wear and tear, scratches can make your furniture look old and worn out. Luckily, there are several DIY techniques you can use to restore scratched surfaces and make your wood furniture look like new again.

Furniture Touch-Up Markers: One easy way to repair scratches on wood furniture is to use furniture touch-up markers. These markers come in a variety of colors to match different wood tones, allowing you to fill in scratches and nicks seamlessly.

Sand and Refinish: For deeper scratches, you may need to sand down the affected area and refinish the wood. Start by sanding the scratched area with fine-grit sandpaper to smooth out the surface. Then, apply a matching wood stain and finish with a protective coat of polyurethane.

Replacing Broken Hardware: Tips for Updating and Repairing Furniture Pieces

One of the easiest ways to update and repair furniture pieces is by replacing broken hardware. Whether it’s a loose drawer handle, a missing knob, or a cracked hinge, updating the hardware can give your furniture a fresh new look. Here are some tips and tricks to help you with DIY furniture repair:

  • Assess the damage: Before you start replacing hardware, assess the damage to determine the best course of action. Make sure to inspect all the hardware on the furniture piece to identify what needs to be replaced or repaired.
  • Gather your supplies: Once you’ve assessed the damage, gather all the necessary supplies for the repair. This may include replacement hardware, tools like screwdrivers or drills, and any other materials needed to complete the repair.
  • Choose matching hardware: When replacing hardware, make sure to choose pieces that match the style and finish of the existing hardware. This will help ensure a cohesive look and prevent the repaired piece from looking mismatched.
  • Take your time: DIY furniture repair can be a rewarding project, but it’s important to take your time and work carefully to ensure a professional-looking result. Don’t rush the process, and follow instructions carefully to avoid any mistakes. With a little patience and attention to detail, you can update and repair your furniture pieces with ease.

    Polishing and Refinishing: Transforming Old Furniture with Expert Advice

    Looking to breathe new life into your old furniture pieces? With the right tools and techniques, you can easily transform worn-out furniture into stunning statement pieces for your home. Whether you have a vintage dresser that needs a fresh coat of paint or a scratched-up coffee table that needs refinishing, these DIY furniture repair tips and tricks will help you achieve professional-looking results without breaking the bank.

One of the key steps in polishing and refinishing old furniture is proper preparation. Before you start any refinishing project, make sure to clean the piece thoroughly to remove dirt, grime, and old finishes. Use a gentle cleaner and a soft cloth to wipe down the surfaces, and allow the piece to dry completely before moving on to the next step.

For refinishing wood furniture, sanding is a crucial step to ensure a smooth and even finish. Start with a coarse-grit sandpaper to remove any existing finish or imperfections, then gradually work your way up to a finer grit for a polished look. Fill in any cracks or holes with wood filler, and sand the surface again before applying stain or paint.

When it comes to choosing a finish for your furniture, consider the style and durability you want to achieve. Whether you opt for a glossy lacquer, a matte chalk paint, or a natural wood stain, make sure to apply multiple coats for a long-lasting and professional finish. Remember to let each coat dry completely before applying the next one, and don’t forget to protect your newly refinished piece with a coat of clear sealer or wax.

Whether you’re a seasoned DIY pro or just starting out, tackling furniture repair can be a rewarding and satisfying endeavor. By following these tips and tricks, you can breathe new life into your old furniture pieces and save money in the process. Remember, patience and attention to detail are key when it comes to getting the best results. So roll up your sleeves, grab your tools, and let your creativity run wild as you transform your furniture into something truly unique and beautiful. Happy repairing!

Transforming your outdoor space into a cozy retreat doesn’t have to break the bank. With a little creativity and some DIY spirit, you can enhance your yard with personalized touches that will make your space truly one-of-a-kind. From repurposed planters to handmade garden accents, here are some DIY outdoor decor projects to help you elevate your yard to the next level.

30 Cheap Backyard Ideas for Outdoor Spaces Large and Small

Creative Ways to Brighten Up Your Outdoor Space

Looking to add some personality and flair to your outdoor space? Get ready to roll up your sleeves and dive into some DIY outdoor decor projects that will take your yard to the next level. Whether you have a spacious backyard or a cozy patio, there are plenty of and make it truly your own.

One fun and easy project to enhance your yard is to create a mini herb garden using old tin cans or mason jars. Not only will this add a pop of greenery to your space, but it will also provide you with fresh herbs for cooking. Simply label each can or jar with the herb’s name using colorful markers or paint for a charming touch.

If you have a fence or wall in your outdoor space, consider adding a vertical garden to liven up the area. Use sturdy hooks or a trellis to hang a variety of plants and flowers in a visually appealing arrangement. You can even mix in some hanging lanterns or string lights for a cozy ambiance in the evenings.

Innovative Ideas for DIY Garden Accents

Enhancing your yard with DIY garden accents is a fun and rewarding way to personalize your outdoor space. By incorporating innovative ideas into your projects, you can create unique and eye-catching decor that will impress your guests and add a touch of whimsy to your garden.

One creative idea for DIY garden accents is to repurpose old items into new decorations. For example, you can turn an old wooden ladder into a vertical garden by adding shelves and planting pots of colorful flowers. Another idea is to transform old tires into planters by painting them in bright colors and stacking them to create a tiered display.

Another way to add flair to your yard is by incorporating elements of light and sound. You can create a DIY wind chime using recycled materials like old silverware or seashells, or install solar-powered lights along your garden path for a magical nighttime ambiance. These simple touches can make a big impact on the overall look and feel of your outdoor space.

Enhancing Your Yard with Handmade Outdoor Decor

One way to elevate the look of your yard is by adding handmade outdoor decor. DIY projects not only add a personal touch to your outdoor space but also allow you to unleash your creativity. From simple planters to elaborate garden sculptures, there are countless ways to enhance your yard with handmade decor.

Garden Signs: Create custom garden signs using reclaimed wood or metal scraps. Add inspirational quotes, your family name, or fun sayings to personalize your outdoor space.

Mosaic Stepping Stones: Make beautiful mosaic stepping stones using broken tiles or glass. These decorative pieces not only add a pop of color to your yard but also provide a functional pathway through your garden.

Repurposed Birdhouses: Turn old furniture or kitchenware into charming birdhouses. Get creative with paint, stencils, and embellishments to make unique homes for your feathered friends.

Hand-painted Planters: Add a splash of color to your yard with hand-painted planters. Use stencils, patterns, or freehand designs to create eye-catching containers for your favorite plants.

Incorporating handmade outdoor decor into your yard not only enhances its aesthetics but also provides a fun and rewarding DIY project. Let your imagination run wild and create a space that reflects your personality and style.

Tips for Creating a Cozy Outdoor Oasis with DIY Projects

Looking to transform your outdoor space into a cozy oasis? With a little creativity and some DIY projects, you can create a beautiful and inviting outdoor area that you’ll love spending time in. Here are some tips to help you get started:

Create a Relaxing Seating Area: Start by creating a comfortable seating area where you can relax and unwind. Consider building a wooden bench or repurposing old chairs with a fresh coat of paint. Add some throw pillows and blankets for extra comfort.

Add Some Mood Lighting: Lighting can completely transform the ambiance of your outdoor space. Hang string lights, set up lanterns, or even build your own DIY fire pit for cozy evenings spent under the stars.

Grow Your Own Greenery: Incorporating plants and flowers into your outdoor oasis can create a serene and peaceful atmosphere. Consider building a vertical garden or planting a small herb garden to add some greenery to your space.

Personalize Your Space: Add personal touches to your outdoor oasis with DIY projects like painting a custom sign, creating a mosaic table, or building a small water feature. These unique touches will make your space feel truly your own.

With these DIY outdoor decor projects, your yard is sure to become the envy of the neighborhood. Whether you’re looking to add a personal touch or create a cozy outdoor oasis, these ideas are perfect for sprucing up your outdoor space. Get your tools ready and let your creativity shine as you transform your yard into a beautiful and welcoming outdoor retreat. Happy decorating!

Pin It