Tag

Upcycling

Browsing

In a world of fast furniture trends and disposable decor, there’s a unique charm in giving new life to old pieces. Enter the art of repurposing vintage furniture for a modern look. By blending the old with the new, you can create a one-of-a-kind style that exudes character and adds a touch of nostalgia to your home. Join us as we explore the creativity and ingenuity behind repurposing vintage furniture into modern masterpieces.

Should You Upcycle Antique Furniture?

Repurposing Old Furniture With Chic Paints and Finishes

When it comes to giving old furniture a new lease on life, nothing beats the power of chic paints and finishes. With some creativity and a little elbow grease, you can transform vintage pieces into stunning focal points for your home.

One of the key elements in repurposing old furniture is choosing the right paint color. Soft pastels like blush pink or mint green can give a feminine touch to a worn-out dresser, while bold hues like navy blue or emerald green can make a statement in a modern living room. Experiment with different color combinations to find the perfect match for your personal style.

Aside from paint, consider adding unique finishes to elevate the look of your repurposed furniture. Metallic accents like gold leaf or silver foil can bring a touch of glamour to a plain side table, while distressed finishes can give a rustic charm to a vintage cabinet. Don’t be afraid to mix and match different techniques to create a truly one-of-a-kind piece.

Mixing Vintage Pieces with Contemporary Decor

One of the most captivating ways to elevate your home decor is by mixing vintage pieces with contemporary design elements. By incorporating old-fashioned furniture with modern decor, you can create a unique and eclectic space that reflects your personal style and tells a story.

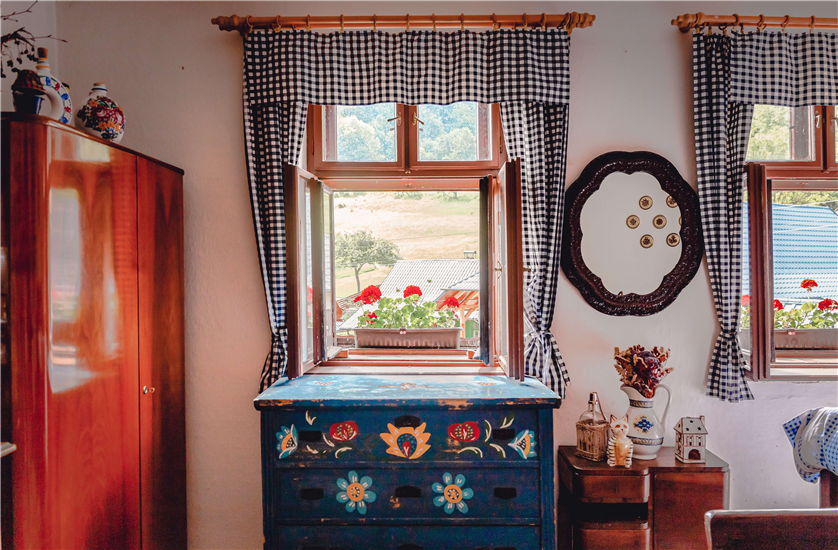
To achieve this blend of old and new, consider repurposing vintage furniture to give it a modern twist. For example, you can update a traditional wooden dresser with a fresh coat of paint in a bold color like navy blue or vibrant yellow. Pair it with sleek, minimalist accessories to create a striking contrast that will make the piece stand out in any room.

Another idea is to mix and match different styles and eras by combining a vintage armchair with a contemporary coffee table and a geometric rug. This eclectic approach adds interest and character to your space, creating a dynamic and visually captivating environment. Don’t be afraid to experiment with textures, patterns, and colors to create a harmonious balance between old and new.

By repurposing vintage furniture for a modern look, you can breathe new life into old pieces and create a space that is both stylish and timeless. Whether you’re a fan of mid-century modern or traditional farmhouse style, mixing vintage with contemporary decor is a great way to express your creativity and showcase your individuality.

Bringing New Life to Antique Furniture Through Upholstery

When it comes to antique furniture, there is often a fine line between preserving its historical beauty and making it work for modern living spaces. One way to bridge this gap is through the art of upholstery. By reupholstering vintage pieces, you can bring new life to old furniture and give it a fresh, modern look that fits seamlessly into contemporary decor.

Incorporating Vintage Furniture into Minimalist Design Schemes

One of the most exciting challenges in interior design is finding ways to seamlessly blend vintage furniture into a minimalist design scheme. Repurposing old pieces of furniture can inject character and charm into a modern space, adding layers of history and personality.

When incorporating vintage furniture into a minimalist design, focus on quality over quantity. Choose a few key pieces that have unique shapes or interesting textures to serve as focal points in the room. For example, a rustic wooden armoire or a mid-century modern chair can add a touch of nostalgia to an otherwise sleek and simple space.

To create cohesion between the vintage and modern elements in the room, consider updating the vintage furniture with a fresh coat of paint or new upholstery. Mix and match different styles and eras to create a dynamic and visually appealing space that tells a story. Embrace the beauty of imperfection and celebrate the history of each piece as it adds character to your minimalist design scheme. In conclusion, transforming vintage furniture into pieces that suit modern tastes is not only a fun and creative challenge, but also a sustainable way to update your living space. By repurposing and upcycling old pieces, you not only give them a new lease on life but also add a unique touch to your home decor. So next time you come across a piece of vintage furniture, don’t hesitate to get your creative juices flowing and give it a modern makeover that will surely impress and inspire. Embrace the beauty of the past with a touch of present flair!

Are you tired of staring at that wobbly chair or scratched up coffee table in your living room? Have no fear, because DIY furniture repair is here to save the day! In this article, we will explore some clever tips and tricks to help you breathe new life into your old furniture pieces. Whether you’re a seasoned DIY enthusiast or a total amateur, these simple yet effective techniques will have you feeling like a pro in no time. So, grab your tools and let’s get to work!

Thomas Furniture Restoration, 47% OFF | www.flavors.qa

When it comes to DIY furniture repair, headings are crucial for organizing your project and keeping track of each step. Here are some tips and tricks to help you make the most of your

  • Use descriptive Make sure your headings clearly indicate what each section is about. This will help you stay organized and easily navigate through your repair process.
  • Group related tasks together: Organize your headings in a logical order that makes sense for the repairs you need to make. This will help you tackle one task at a time without feeling overwhelmed.
  • Consider using sub If your repair project is complex, consider using subheadings under main headings to further break down the tasks. This will help you stay focused and not miss any important steps.
Heading Type Importance
Main Headings Essential for organizing the overall project
Subheadings Useful for breaking down complex tasks

Fixing Loose Joints: A Guide to Strengthening Wobbly Furniture

If you have wobbly furniture in your home, don’t fret! There are simple DIY techniques you can use to strengthen those loose joints and make your furniture more stable. Here are some tips and tricks to help you fix your wobbly furniture:

  • Tighten screws and bolts: Check for loose screws or bolts in the joints of your furniture. Use a screwdriver or wrench to tighten them up, which can help stabilize the piece.
  • Apply wood glue: If the joints are still loose after tightening the screws, apply wood glue to the area. This will help bond the pieces together and provide extra strength.
  • Insert wooden dowels: For extra reinforcement, you can insert wooden dowels into the joints. Drill holes into the pieces, apply wood glue, and insert the dowels to add more stability.

Restoring Scratched Surfaces: Techniques for Repairing Wood Furniture

One common issue many homeowners face is dealing with scratches on their wood furniture. Whether it be from pets, kids, or just general wear and tear, scratches can make your furniture look old and worn out. Luckily, there are several DIY techniques you can use to restore scratched surfaces and make your wood furniture look like new again.

Furniture Touch-Up Markers: One easy way to repair scratches on wood furniture is to use furniture touch-up markers. These markers come in a variety of colors to match different wood tones, allowing you to fill in scratches and nicks seamlessly.

Sand and Refinish: For deeper scratches, you may need to sand down the affected area and refinish the wood. Start by sanding the scratched area with fine-grit sandpaper to smooth out the surface. Then, apply a matching wood stain and finish with a protective coat of polyurethane.

Replacing Broken Hardware: Tips for Updating and Repairing Furniture Pieces

One of the easiest ways to update and repair furniture pieces is by replacing broken hardware. Whether it’s a loose drawer handle, a missing knob, or a cracked hinge, updating the hardware can give your furniture a fresh new look. Here are some tips and tricks to help you with DIY furniture repair:

  • Assess the damage: Before you start replacing hardware, assess the damage to determine the best course of action. Make sure to inspect all the hardware on the furniture piece to identify what needs to be replaced or repaired.
  • Gather your supplies: Once you’ve assessed the damage, gather all the necessary supplies for the repair. This may include replacement hardware, tools like screwdrivers or drills, and any other materials needed to complete the repair.
  • Choose matching hardware: When replacing hardware, make sure to choose pieces that match the style and finish of the existing hardware. This will help ensure a cohesive look and prevent the repaired piece from looking mismatched.
  • Take your time: DIY furniture repair can be a rewarding project, but it’s important to take your time and work carefully to ensure a professional-looking result. Don’t rush the process, and follow instructions carefully to avoid any mistakes. With a little patience and attention to detail, you can update and repair your furniture pieces with ease.

    Polishing and Refinishing: Transforming Old Furniture with Expert Advice

    Looking to breathe new life into your old furniture pieces? With the right tools and techniques, you can easily transform worn-out furniture into stunning statement pieces for your home. Whether you have a vintage dresser that needs a fresh coat of paint or a scratched-up coffee table that needs refinishing, these DIY furniture repair tips and tricks will help you achieve professional-looking results without breaking the bank.

One of the key steps in polishing and refinishing old furniture is proper preparation. Before you start any refinishing project, make sure to clean the piece thoroughly to remove dirt, grime, and old finishes. Use a gentle cleaner and a soft cloth to wipe down the surfaces, and allow the piece to dry completely before moving on to the next step.

For refinishing wood furniture, sanding is a crucial step to ensure a smooth and even finish. Start with a coarse-grit sandpaper to remove any existing finish or imperfections, then gradually work your way up to a finer grit for a polished look. Fill in any cracks or holes with wood filler, and sand the surface again before applying stain or paint.

When it comes to choosing a finish for your furniture, consider the style and durability you want to achieve. Whether you opt for a glossy lacquer, a matte chalk paint, or a natural wood stain, make sure to apply multiple coats for a long-lasting and professional finish. Remember to let each coat dry completely before applying the next one, and don’t forget to protect your newly refinished piece with a coat of clear sealer or wax.

Whether you’re a seasoned DIY pro or just starting out, tackling furniture repair can be a rewarding and satisfying endeavor. By following these tips and tricks, you can breathe new life into your old furniture pieces and save money in the process. Remember, patience and attention to detail are key when it comes to getting the best results. So roll up your sleeves, grab your tools, and let your creativity run wild as you transform your furniture into something truly unique and beautiful. Happy repairing!

Pin It